
Have you ever had to send the same message to dozens or hundreds of contacts and waste a lot of time copying and pasting? With the Word Union Printing you can solve the problem: write a single email, link a list of recipients and let the program do it all for you, generating personalized messages for each one.
Let’s see together how it works, step by step!
Prepare the main document
First open an empty document in Word and write the body of your email just as you would normally do.
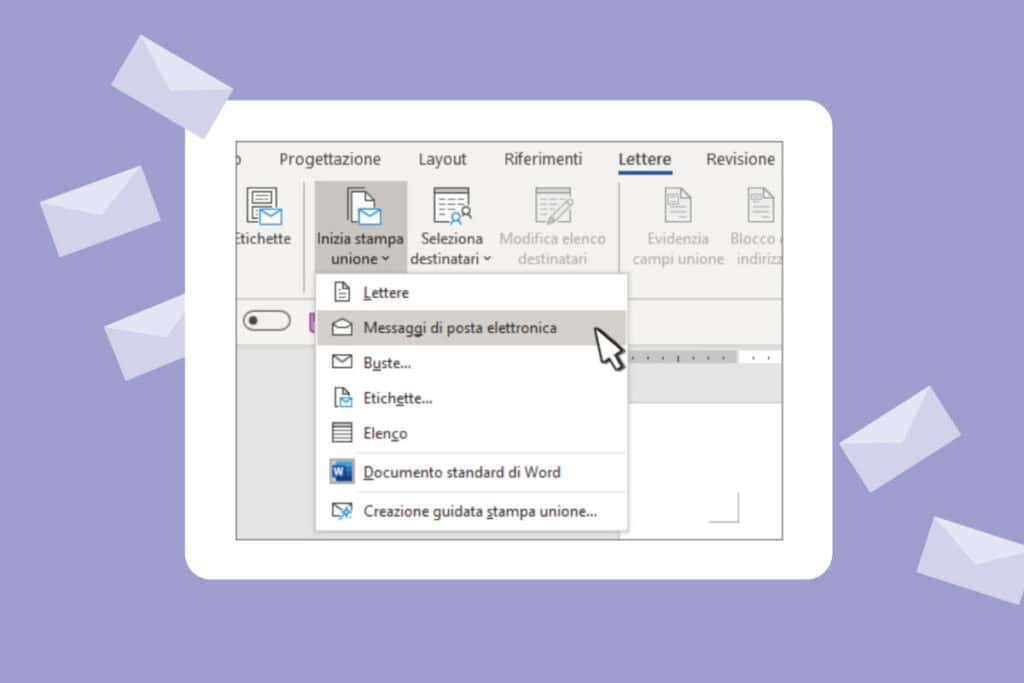
Then go to the Letters tab and choose the option Start mail merge > Email messages.
This way you are telling Word that you will use the document to send emails, not letters or labels.
Configure the mailing list
The heart of the stampa unione printing is the mailing list: the list of your recipients. You can create a new one directly in Word, use an existing file (for example, an Excel), or, if you already work with Outlook, import contacts from there.
It is important that in the list there be a column dedicated to email addresses and that each row contain a valid address. Once the list is ready, link it to the document through Letters > Recipient Selection. If you notice you need to modify or filter contacts, you can always use the item Edit Recipients.
Connect the mailing list to the email message
Once the document is prepared, it’s time to link it to your recipient list. The mailing list is the data source, i.e., the basis on which Word will build the emails.
You can handle it in several ways: create a new list directly in Word, use an already prepared file (for example, an Excel sheet) or import contacts from Outlook. If you choose the latter option, remember that Outlook must be set as the default email program and should have the same version of Word to work without hiccups.
Before proceeding, make sure that your list contains a column dedicated to email addresses and that each contact has their address filled in correctly. Without this step, Word will not be able to send the messages.
Now connect the data to the document: go to Letters > Recipient Selection, choose the source to use and save with File > Save. If you need to modify, order or filter contacts later, you can do it easily via Merge Print > Edit Recipients.
In this way your message is ready to be personalized and sent only to who you really wish to reach.
Adding custom content to the email message
One of the most useful functions of union printing is the possibility of personalize messages. In this way every recipient receives an email that seems written just for him, instead of a generic text.
To start, go to Letters > Opening Formula and choose the format you prefer (for example “Dear Mario Rossi,”). Confirm with OK and the union field will be inserted in the document. Remember to save your work with File > Save.
Beyond the initial greeting, you can add other data fields such as company name, role, or any other useful information. Once the fields are inserted, you can format the text manually, modifying fonts, size, or spacing as you would with any other content in Word.
If you notice that a data point is missing or that the fields do not match perfectly, just go to Field Matching to correct the issue.
So, with a few steps, transform a standard email into a targeted and personal message: the difference between an anonymous mass send and a communication that truly captures attention.
Preview and completion
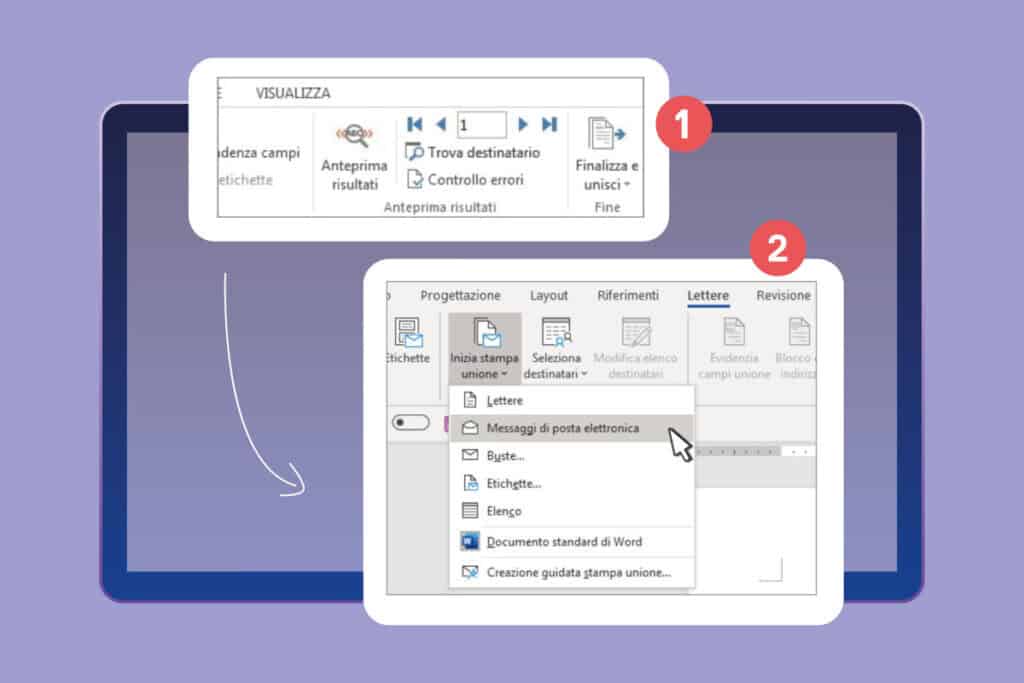
Before the actual submission, it’s always better to give a final look at the result. With the Anteprima risultati option you can scroll through the different recipients using the Next or Previous arrows and verify that the names and addresses are correctly inserted in the body of the message.
If everything is in order, proceed to the final phase: Finalize and combine > Send email messages.
In the A (Recipient) field select the column that contains the email addresses of your mailing list. Then write the message subject and choose the format: HTML (default setting, ideal if you want to maintain formatting) or normal text.
A key detail: Word sends an individual message to each address. This means you won’t be able to add recipients in CC or Bcc and files cannot be attached, although you can freely insert links in the body of the email.
Finally, decide who to send it to:
- All records (default selection).
- Current record if you want to ship only to the contact you are viewing.
- From… to… per definire un intervallo specifico di record.
When you have set everything up, click on OK and Word will start sending the emails.
So, in a few steps, you have completed your mass sending campaign, but with the care of a personalized message for each recipient.
Save Custom Message
Once the work is completed, it is important to save the document correctly.
Bare click on File > Save: this way not only the main document is saved but also the connection with the data source. This means that when you will want to reuse it, you will just have to open the file and confirm with a simple “Yes” to the request to maintain the data connection.
In this way you will always have ready a template already linked to your contact list, ready for new campaigns or communications.
Conclusions
The stampa unione is an powerful tool because it allows to automatize processes, reduce manual errors and optimize times. Thanks to this function, you can send personalized communications to a great number of recipients with few steps, maintaining at the same time a professional and careful approach.
If you wish to fully leverage all the potentials of union printing, or if you encounter difficulties in configuring your documents, contact us: we will be glad to offer dedicated consultation and support you in solving any issue!